Posts

October 28, 2007: Getting higher

Image
Once it got high enough to hurt myself, I strung up a 1/4" steel safety line. Notice the harness. Also used a 2x12 on the forks, so I could get around the RPSL's easier.

October 25th, 2007: Mud!

Image
Finally had a couple days of rain, so things started to get mucky around the building site. The log pile definitely getting smaller.

October 21st, 2007 : Setting center RPSL

Image
We set the middle girder & RPSL today. The middle one is bolted to the girder log, & they'll all be tied together once the ridge pole goes on. The outside ones are bolted to the log walls.

October 20th, 2007, 2nd floor girders

Image
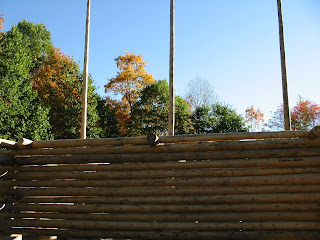
This is the front girder for the second floor. The floor joists will sit on this, & the girders will support the weight of the second floor. Here's the back girder poking out of the wall.

October 14th, setting RPSL's

Image
We decided to set the two front & back RPSL's (Ridge Pole Support Logs) since I had help for the weekend. Here's Jessica standing in front of the first one we set. Here's me at the end of our day. We left the logs at 37' just for fun (got some weird questions about those over the next week or two). They'll get cut off once we know how high the roof needs to be.

October 2007: Day Three

Image
I took the entire month of October off to set logs. Worked out well, the majority of the time was blue skies & good weather, only 2 rain days. Here I am chainsawing off the end of a butt log to fit. The logs are pinned every 2'. We used a demo hammer for the first few rows but once we were in the air we just used a mini sledge. Here is a rock throwing machine to put about 4" of stone into our crawlspace. Pretty cool, it shot the stone 35'.

October 2007: Day One

Image
We rented a 42 ft Telehandler (forklift) for setting the logs. We had read several accounts on the Log Home forum about some of the struggles other members experienced when they set their first row of logs. It really was not that bad, we ended up setting the first row of logs with little troubles. Tim, Jessica's Dad, and bother came out to help. Each log was pre-drilled so that they could be placed on rebar, was in the Sonotube. Once the log was placed on the rebar, we cut it leaving only about 3 inches, and hammered down to secure the log in place. After all four logs were place, the corners were pinned with rebar. Even Marley was working hard :) He was so tired and messy by the end of the day!