Posts

Kitchen Island

Image
After searching some shops around town, we couldn't find a decent kitchen island. They were either the wrong color, style, or way too pricey. We decided to build our own. Picked up some maple from Menards and used a "This old house" article to get started. Built 2 identical shelves: Here are the corners, Then we used some wood conditioner, followed by stain to match our kitchen cabinets: Finished the assembly today (sweet plywood top huh?), the granite top (to match our existing counters) should be ready next week:

Mantel is finally done!

Image
Finished the mantel the other night. We had a couple poplar 4x10's left over from building, so I cut them down to 2.5" thick by about 8" deep & used them for the mantel around the pellet stove. Close up. We used a water based polyurethane & it really brings out the grain of the poplar. These will turn into many shades of brown after they age a while. Still a bit green since I just planed them down.

Finishing corner hearth....

Image
Here is the metal mesh/lathe that will help hold the mortar & stone to the wood frame. You can see I left a couple inches clearance around the vent pipe. The mesh overhangs the edge & the stone should butt up nicely around the edge for a clean finish. Next is the scratch coat of mortar (I think that's the term anyways)....the mesh holds in in place, and once it's cured the stone will have a good layer to adhere to. Here is the base, big 18" stones for the bottom & 1 thin layer of stone along the bottom/front. Here is a few rows of stone I finished today after work. It's a bit difficult to get the corners to fit against the logs, but a diamond grinder wheel helps the process. Few more rows up....getting closer. It would go alot quicker if I didn't have to cut each corner so it matches up to the logs. All the stone is done. Just have to finish the mantle on the top.

Pellet Stove Installation

Image
Picked up our new pellet stove on Saturday, we decided on a Maxfire Santa Fe. Should be around 86% efficient & help allot with the heating bills. We are building a hearth in the corner for it to sit on & protect the floors/walls. First we put down some tape to get the outline, then a layer of foam to protect the hardwood, incase it ever is removed. Then 2 layers of 3/4" OSB. By the time we add the wire mesh, mortar scratch coat & stone, the vent should line up where I want it to go through the wall. Marley is supervising.... Here is the basic layout. We are waiting on some cultured stone to finish it off. It is a 'dry stack' look so you won't see grout lines. Should be interesting. Will also use some spare 4x10 leftover from our 2nd floor beams to make a mantle along the top. First fire! The stone place is dragging their feet on our order, so we installed the stove. It's pretty toasty in the house today & the electric furnace hasn't ran at ...

Happy New year

Image
Say hello to 2010! No new pics, but stay tuned...we are planning to install a pellet multi-fuel stove in the near future. Should be an interesting project. So far the last few weeks have been interesting, found some mice (took care of that issue!), had a bat in the attic, found a water leak, & most recently discovered our deep freezer was plugged into a GFI...& it tripped without us knowing. Luckily not much in the freezer, but we did lose 2 nice New york steaks that would have been tasty....grrr. Here's some pics: This is where the leak came from (& the nice hole I had to cut in the wall to access it haha): Not bad for the first time I had to patch drywall....You can also see the trim piece that hides the gap from the drywall to the log wall. We have almost every piece done, just a couple left. They take forever to get a good fit.

Wait...what is this? A new post?

Image
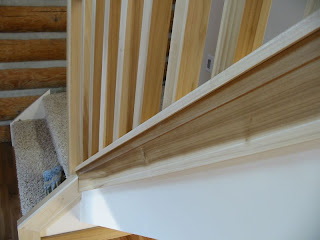
About time I guess. We've been enjoying having some free weekends to go biking & golfing. Most of the inside trim (door & window casing, baseboards etc) is finished & clear-coated. Here's some trim around the stairs: More trim going up the stairs, we tried to "show off" some of the girders & RPSL's where the drywall butts up to them. Gives it a different look, since the logs aren't milled to 1 size, you can see the taper & character. Here's our front picture window with trim on it (and a bit of chinking on the outside still!) Down bath: Used some small 1/2" x 1" poplar trim for around the 4x10 beams for the second floor, also handy as we used it where drywall butts up to RPSL's & girders. Dining room, we still have to find a matching island to go in the front corner of the kitchen for more cabinet & counter space. We finally started trim on the outside of the windows. We used the same stain as on the gable ends,...

Couple new pics

Image
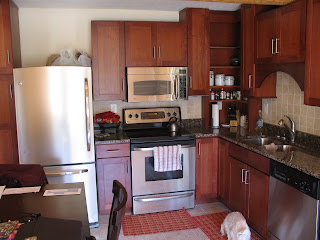
I've been busy with work now that it's warm again, sorry for no updated pics! Here's the kitchen, we finally received the fridge that was ordered, much better than the mini fridge we were borrowing :) Here's what our interior doors look like, they are maple (wanted poplar, but too $$) & shaker-style 2 panel. The trim & baseboards are all poplar. Here's the closet doors in the downstairs bedroom: Just have 1 window left to trim, and the upstairs baseboards, then to the outside stuff, porch etc.